Sad post to start of the new year. The Novara Transfer, which I reviewed in my last post, was stolen from a bike noodle. I didn't have a U lock on it, but it was a pretty robust cable lock that is shaped like a U lock. This lock is a small, thick rubber encased cable and not like the traditional cable locks that are sold in your Xmart stores.
I filed a police report today at lunch. The officer who took the report said he was going to look at some security cams that may have filmed the bike being stolen. Yay for living in one of the cities with the most security cams in the world! Also, I posted a "bike stolen!" post on Craigslist. And, I'll check on CL frequently to see if anyone is selling a Novara Transfer. Hopefully, I'll report some good news on this in the future.
Monday, January 6, 2014
Tuesday, August 13, 2013
Another commuter added to stable: Review of REI’s Novara Transfer.
MSRP=$799
Price Paid=$639.20 (used REI 20% off coupon)
 Picked up another commuter that will get extensive use as a
short range commuter. Basically will use
it to get to the subway station and/or for trips to the grocery store. First, this is a steel framed commuter, which
gives you a more comfortable ride vs. an aluminum bike with no suspension. REI really thought this bike out to give commuters
a lot of necessary bells/whistles.
Picked up another commuter that will get extensive use as a
short range commuter. Basically will use
it to get to the subway station and/or for trips to the grocery store. First, this is a steel framed commuter, which
gives you a more comfortable ride vs. an aluminum bike with no suspension. REI really thought this bike out to give commuters
a lot of necessary bells/whistles.
Likes:
Upright ride. The design of this bike allows you to 1) sit
upright and 2) let your elbows fall comfortably at your side. The result: you get to ride and see the world
around you. This is so much better that
being hunched over the handlebars. The
drawbacks of an upright ride are that you won’t obtain an “aero” position and
won’t go superfast. But that’s not what
a city commuter bike is meant to do.
IGH (internal gear hub).
Again, the great benefit in having an IGH in a commuter is you can downshift
gears while at a stop. This is easier on
your knees! Has a nice range of 7 gears
in the included Shimano Nexus hub. I had
had an issue with an earlier Nexus 7 hub that kind of froze up when I left this
bike out in sub 32 degree weather. That
issue was not duplicated when I used a Shimano Alfine 8 speed hub, though. We
shall see if this Nexus hub freezes up like the old models.
Generator powered light. This light works when you pedal. It
is not a bright light by any means, but it helps cars see you when you are
coming towards them. The brand of the
light is “Basta” which has a good reputation in Europe. Perhaps I can replace the bulb when it gives
out with an LED light. LEDs give you
more light using the same battery as a basic bulb that you have in flashlights,
for example.
Chainguard. As I’ve
mentioned before, to attract bikes to the masses, you need to make bikes
friendly to everyone. That means being able to ride bikes in everyday
clothes. You can safely wear pants to ride this
bike with the chainguard! No need to
wear spandex or even rolling up your pants legs so that they won’t get
caught in the chain.
Dislikes:
Fenders. I like that this bike came with fenders. Fenders are great when riding in the rain as
they prevent rain splatter from going up your back as you ride in the rain. But
REI put on some steel fenders on this bike.
That may have been a mistake. I recently chipped the front fender and
there is some rust forming on there (see pix).
Perhaps, they should have installed some aluminum or plastic fenders to
avoid this.
Cork handgrips. I
will sometimes leave this bike outside at a bike rack and exposed to the sun
and elements. After I left it out one
time, I came back to it and found that the cork grips were sticky. I’m not sure
if the sun did it or a little bit of rain, but the cork seems to be
releasing some goo. It doesn’t feel good to ride
and have some sticky residue left in your hands after you dismount. The cork grips look cool and are very
aesthetic, but a better choice would have been to use rubber.
Wednesday, April 3, 2013
Floating style chainguard.
Sorry I haven't posted in so long. Still bicycling/commuting. Not as much
due to work and family but I can’t give it up!
So I bought this chainguard from a local cyclist that was
selling his on craigslist. Pretty sure it’s this OGK chainguard by Soma
Fabrications:
The only hangup was that the seat tube was a little thicker
than the downtube. So, I had to use a
larger hoseclamp for the thicker tube. The included tube wraparounds weren’t
long enough. I couldn’t get it to set
flat and upright. It kinda juts out in the back, but since your pants go up when you pedal, it doesn’t get caught. Gotta
be careful when you bring you straddle the bike, or you could hit it. Kinda “floats” over the chain. Pretty
cool. Working well so far.


Monday, February 13, 2012
 So far we’ve had very mild winter temperatures. This weekend, however, we had a cold blast that came down from Canada and dropped our temperatures to below freezing. I think yesterday’s high was around 31 and Saturday was a little bit colder. Thus, I left my bike outside rather than in the comfort of my garage to try an experiment.
This morning (temp 25 degrees) I rode it after it sat outside the whole weekend and it shifted fine. I had a prior problem with the Nexus 7 that seemed to not shift during prolonged subfreezing temperatures. For the Nexus 7, the indicator showed that I had downshifted or upshifted, but the gear inside the hub did not move. I can only attribute this to subfreezing temperatures since it shifted fine when things warmed up. Maybe the Nexus 7 uses a more liquid-type grease in there (?). So count this as an advantage for the Nexus Alfine.
I realize that our cold temperatures are laughable to some of you in colder climes, but there you go. Maybe if average temps are the in the teens or single digits, it could affect the Alfine, but we haven’t gotten those this year. And, I don’t know if I would have any desire to ride in that kind of weather, lol.
Monday, November 28, 2011
Paid $60 for this Dahon on Craigslist!
 Picked up this Dahon Vitesse 3 speed on CL recently. It was actually $100, but the guy threw in his El Bolso bag with it. The El Bolso hadn’t even been used! Well, I sold the El Bolso for $40. Thus, my net for the Dahon was $60. I don’t know what I’ll do with another bike, but at this price I couldn’t pass it up. I’ll post a review later.
Tuesday, September 27, 2011
Another Dollar Store Find.

Found this at the Dollar Tree. Anyone who commutes in an urban area could really use this air horn. I carry one of these by mask taping it to my handlebar. When you’ve expended all the air, just tear it off and do it again. Masking tape leaves very little, if any, sticky residue. Or you could always carry it on our waist or backpack. Also, helpful to scare away dogs. For $1, it’s a steal.
Thursday, July 7, 2011
Re-lubing, Re-conditioning the Downtube front suspension fork.
As I posted earlier, I found that my stock downtube 8H front fork did not have as much travel as my Full suspension downtube. I ended up buying an earlier downtube front fork from J. Monti. It did have more travel. The fork worked well, but I could detect a little grittiness coming from the fork as I bounced it up and down.

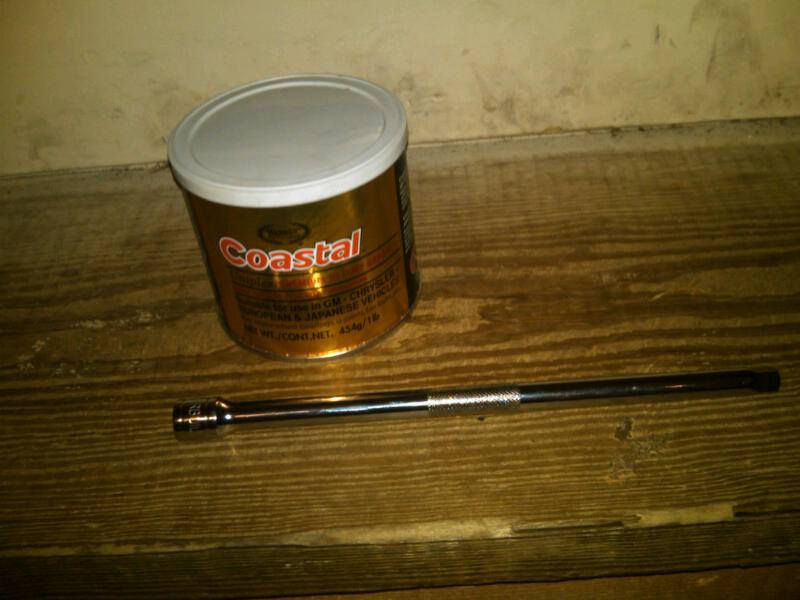
So, I undertook this project to recondition, or relube, the front fork so it could have freer up/down play. Tools needed:
*Socket extension bar (I think mine is 9” or 10”)
*5mm socket
*Cheap Automobile grease (I used Coastal hi-temp grease)
*Skintight nitrile or other surgical type gloves (to keep your hands clean)

It is a straightforward job. You undo the Vbrakes, remove the wheel. Remove the protective caps on the top of the suspension fork. Insert the socket extension until you feel yourself gripping the screw head. Then, just turn counterclockwise. The fork will separate from the bottom part when you fully loosen the screws. And, the bottom fork bars will slide down.
As you hold the bottom part of the fork, turn it over. The springs will come out. There are some rubber (?) inserts/bushings at the top and bottom of the springs (see pix).That’s pretty much it.

As I suspected, the springs were dry. Some dirt may have penetrated there contributing to that gritty feeling. I lightly cleaned the springs with a cloth. You can be anal and dip the springs in gasoline or some other solvent, but I didn’t do that. Then, I just liberally slogged the grease on the springs all over. I guess the springs looked like tree branches after freezing rain (only with grease not ice). Then, I dropped the springs in the bottom part of the fork, connected it to the top part, and rescrewed. Finally, attach the wheel and brakes.
Much better. I now have a front fork that “gives” much better than it used to. This is a job you can do if you want more play or, I guess, if you have too much play, you can remove some excess grease and dry up your front fork a little. I was afraid that there would be some sort of complicated spring mechanism that I would have trouble putting back together. It was nothing like that.
This guide doesn’t have to be limited to DT bikes, but other MTB-type bikes esp. with cheap suspension forks. You’d just need a longer extension (maybe) or a different size socket.
Subscribe to:
Posts (Atom)